Most wood glues dry clear, which means they wont be visible in the seam between the two planks. Last Updated: December 24, 2020 There are 9 references cited in this article, which can be found at the bottom of the page. Use of this site is subject to certain Terms Of Use. For tips from our Handyman co-author on how to prevent gaps from emerging in your laminate flooring, keep reading! 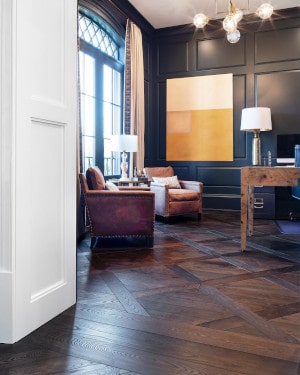 Go online to read reviews of contractors in your area or ask a friend or loved one for a personal recommendation to find one that meets your standards. Hiring a flooring specialist to work on your home involves a certain amount of trust.
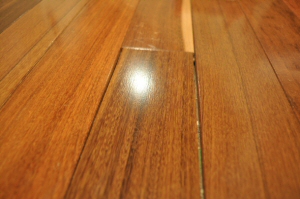
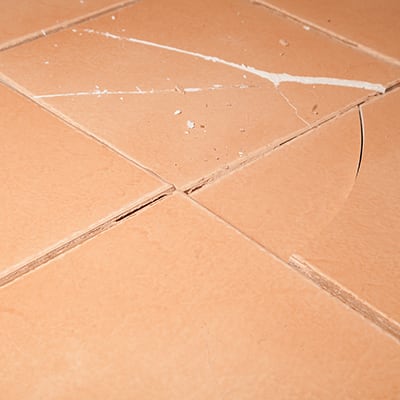
  Open gaps are not only an eyesore, but theyexpose the floor to water damage, chipping, and other issues.
  The adhesive pad of the floor gap fixer is reusable, as long as its properly cleaned between projects. Thanks to all authors for creating a page that has been read 122,491 times. Invest in a high-strength adhesive to spare yourself followup repairs in the future. Why pay someone to fix your floors when you can fix it yourself? If necessary, wipe off any dust or debris thats accumulated on the adhesive pad with a damp cloth before the next time you use it. Some of the other causes include, foundation settling, high traffic, improper installation, low quality flooring, and defective or damaged locking mechanisms.
  Why pay someone to fix your gaps, when you cancompletethe jobyourself for a fraction of the cost? Any clear or yellow wood glue will work just fine. The other ways the FGF will lose adhesive strength is by damaging the adhesive pad and improper use. This causes the planks to shrink which can lead to gapping. For most jobs, all youll need is a simple tube of wood glue, or a mallet and flat object heavy enough to provide enough traction to allow you to tap the planks back into place. Rent a MK Diamond Products Large Tile Saw, Need Help?
  You can also fix gaps by using a floor fixer, which you can buy from a hardware store. When correcting more than one plank in the same row, it may be necessary to also move the neighboring planks inward to keep the spacing consistent and avoid making the gap worse. The Floor Gap Fixer is manufactured using high quality materials that will last with proper use and care. Just make sure its clean before using it on your flooring. Heating the air in the fall and winter months removes the majority of the humidity in the air. When repairing gaps close to a wall, it may be necessary to. All Duties and Taxes are PAID by FGF to Canada. These repairs are more costly and typically require the removal and replacement of the damaged floor.
  We offer Flat Rate International Shipping via USPS (5-10 Days) and a Calculated DHL Express Option.
  Some flooring planks may not be able to move due to binding. If you plan on adding a separate underlayment for insulation, it will be important to make sure its cut properly to eliminate wrinkling, folding, or bunching, all of which could contribute to an off-level subfloor. Local store prices may vary from those displayed. Over time, this can result in noticeable gaps and other inconsistencies. You can then push the 2 boards back together by striking 1 of them at an angle with your fist.
 The Floor Gap Fixer is approximately 2" wide x 10" long.
  By using our site, you agree to our. It is manufactured out of high quality materials to stand up to repeated use. References. Be careful not to strike the block too forcefully.
 Include your email address to get a message when this question is answered.
  We use cookies to make wikiHow great. Gapping in floating floors has many causes. Once the adhesive strip is cleaned and dried, the adhesive strength is restored. The humidity in the spring and summer months cause the planks to expand. Gaps infloating floors are a common problem and haveseveral causes. This article has been viewed 122,491 times. {"smallUrl":"https:\/\/www.wikihow.com\/images\/thumb\/3\/35\/Close-Gaps-in-Laminate-Flooring-Step-1.jpg\/v4-460px-Close-Gaps-in-Laminate-Flooring-Step-1.jpg","bigUrl":"\/images\/thumb\/3\/35\/Close-Gaps-in-Laminate-Flooring-Step-1.jpg\/aid10005020-v4-728px-Close-Gaps-in-Laminate-Flooring-Step-1.jpg","smallWidth":460,"smallHeight":345,"bigWidth":728,"bigHeight":546,"licensing":"
License: Creative Commons<\/a> License: Creative Commons<\/a> License: Creative Commons<\/a> License: Creative Commons<\/a> License: Creative Commons<\/a> License: Creative Commons<\/a> License: Creative Commons<\/a> License: Creative Commons<\/a> License: Creative Commons<\/a>
\n<\/p>
\n<\/p><\/div>"}, {"smallUrl":"https:\/\/www.wikihow.com\/images\/thumb\/d\/d6\/Close-Gaps-in-Laminate-Flooring-Step-2.jpg\/v4-460px-Close-Gaps-in-Laminate-Flooring-Step-2.jpg","bigUrl":"\/images\/thumb\/d\/d6\/Close-Gaps-in-Laminate-Flooring-Step-2.jpg\/aid10005020-v4-728px-Close-Gaps-in-Laminate-Flooring-Step-2.jpg","smallWidth":460,"smallHeight":345,"bigWidth":728,"bigHeight":546,"licensing":"
\n<\/p>
\n<\/p><\/div>"}, {"smallUrl":"https:\/\/www.wikihow.com\/images\/thumb\/5\/54\/Close-Gaps-in-Laminate-Flooring-Step-3.jpg\/v4-460px-Close-Gaps-in-Laminate-Flooring-Step-3.jpg","bigUrl":"\/images\/thumb\/5\/54\/Close-Gaps-in-Laminate-Flooring-Step-3.jpg\/aid10005020-v4-728px-Close-Gaps-in-Laminate-Flooring-Step-3.jpg","smallWidth":460,"smallHeight":345,"bigWidth":728,"bigHeight":546,"licensing":"
\n<\/p>
\n<\/p><\/div>"}, {"smallUrl":"https:\/\/www.wikihow.com\/images\/thumb\/0\/0d\/Close-Gaps-in-Laminate-Flooring-Step-4.jpg\/v4-460px-Close-Gaps-in-Laminate-Flooring-Step-4.jpg","bigUrl":"\/images\/thumb\/0\/0d\/Close-Gaps-in-Laminate-Flooring-Step-4.jpg\/aid10005020-v4-728px-Close-Gaps-in-Laminate-Flooring-Step-4.jpg","smallWidth":460,"smallHeight":345,"bigWidth":728,"bigHeight":546,"licensing":"
\n<\/p>
\n<\/p><\/div>"}, {"smallUrl":"https:\/\/www.wikihow.com\/images\/thumb\/5\/59\/Close-Gaps-in-Laminate-Flooring-Step-5.jpg\/v4-460px-Close-Gaps-in-Laminate-Flooring-Step-5.jpg","bigUrl":"\/images\/thumb\/5\/59\/Close-Gaps-in-Laminate-Flooring-Step-5.jpg\/aid10005020-v4-728px-Close-Gaps-in-Laminate-Flooring-Step-5.jpg","smallWidth":460,"smallHeight":345,"bigWidth":728,"bigHeight":546,"licensing":"
\n<\/p>
\n<\/p><\/div>"}, {"smallUrl":"https:\/\/www.wikihow.com\/images\/thumb\/e\/e7\/Close-Gaps-in-Laminate-Flooring-Step-6.jpg\/v4-460px-Close-Gaps-in-Laminate-Flooring-Step-6.jpg","bigUrl":"\/images\/thumb\/e\/e7\/Close-Gaps-in-Laminate-Flooring-Step-6.jpg\/aid10005020-v4-728px-Close-Gaps-in-Laminate-Flooring-Step-6.jpg","smallWidth":460,"smallHeight":345,"bigWidth":728,"bigHeight":546,"licensing":"
\n<\/p>
\n<\/p><\/div>"}, {"smallUrl":"https:\/\/www.wikihow.com\/images\/thumb\/5\/59\/Close-Gaps-in-Laminate-Flooring-Step-7.jpg\/v4-460px-Close-Gaps-in-Laminate-Flooring-Step-7.jpg","bigUrl":"\/images\/thumb\/5\/59\/Close-Gaps-in-Laminate-Flooring-Step-7.jpg\/aid10005020-v4-728px-Close-Gaps-in-Laminate-Flooring-Step-7.jpg","smallWidth":460,"smallHeight":345,"bigWidth":728,"bigHeight":546,"licensing":"
\n<\/p>
\n<\/p><\/div>"}, {"smallUrl":"https:\/\/www.wikihow.com\/images\/thumb\/0\/0f\/Close-Gaps-in-Laminate-Flooring-Step-8.jpg\/v4-460px-Close-Gaps-in-Laminate-Flooring-Step-8.jpg","bigUrl":"\/images\/thumb\/0\/0f\/Close-Gaps-in-Laminate-Flooring-Step-8.jpg\/aid10005020-v4-728px-Close-Gaps-in-Laminate-Flooring-Step-8.jpg","smallWidth":460,"smallHeight":345,"bigWidth":728,"bigHeight":546,"licensing":"
\n<\/p>
\n<\/p><\/div>"}, {"smallUrl":"https:\/\/www.wikihow.com\/images\/thumb\/a\/a5\/Close-Gaps-in-Laminate-Flooring-Step-9.jpg\/v4-460px-Close-Gaps-in-Laminate-Flooring-Step-9.jpg","bigUrl":"\/images\/thumb\/a\/a5\/Close-Gaps-in-Laminate-Flooring-Step-9.jpg\/aid10005020-v4-728px-Close-Gaps-in-Laminate-Flooring-Step-9.jpg","smallWidth":460,"smallHeight":345,"bigWidth":728,"bigHeight":546,"licensing":"
\n<\/p>
\n<\/p><\/div>"}, {"smallUrl":"https:\/\/www.wikihow.com\/images\/thumb\/4\/4e\/Close-Gaps-in-Laminate-Flooring-Step-10.jpg\/v4-460px-Close-Gaps-in-Laminate-Flooring-Step-10.jpg","bigUrl":"\/images\/thumb\/4\/4e\/Close-Gaps-in-Laminate-Flooring-Step-10.jpg\/aid10005020-v4-728px-Close-Gaps-in-Laminate-Flooring-Step-10.jpg","smallWidth":460,"smallHeight":345,"bigWidth":728,"bigHeight":546,"licensing":"
 Dont be afraid to use more glue than you think you needyou dont want the planks separating again after a few short days. ft. Starter Kit, Screws and Drywall Anchors for OMUR Wall Mount System, Pack of 30 Screws with Anchors, Tool Kit for OMUR Wall Mount System (4 Piece Kit), Connecting Clips (C Clips) for OMUR Wall Mount System (Pack of 36 Clip), Start/Stop Clips for OMUR Mount System Clips with Adhesive Pads (Pack of 16), Mounting Rails Wall Mount System (Pack of 6 Rails). Subfloors that are off alignment will need to be. This article was co-authored by Norman Raverty. Gaps make your floor more susceptible to water damage and chipping.
 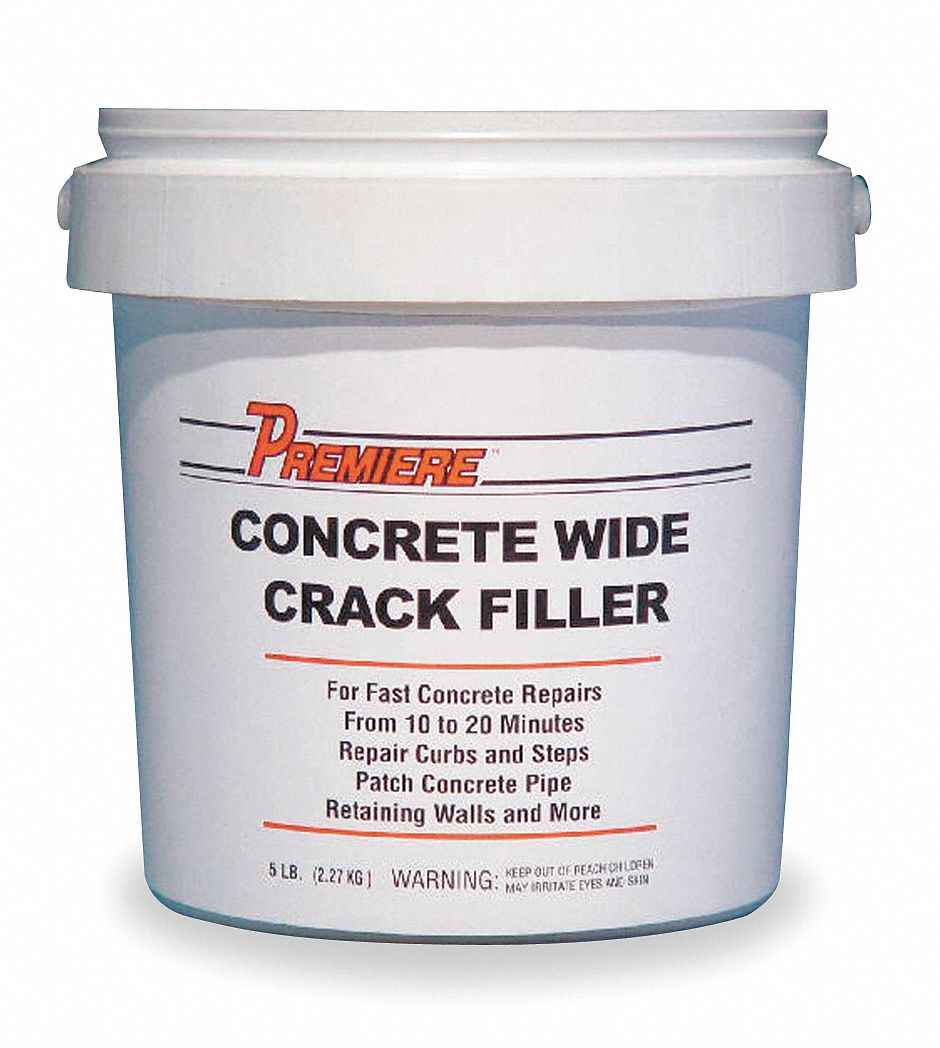 The Floor Gap Fixer is the only tool on the market designed specifically to close gaps in floating floors. Do your best to work neatly and efficiently, but dont take too much time. However, these substances may require special applicators or additional equipment. Protect your investment and get your floors looking great again with the Floor Gap Fixer.
 Level up your tech skills and stay ahead of the curve. If youre trying to keep spending to a minimum for your repair project, try making your own floor gap fixer tool by coating one side of a 4x4 with double-sided tape. With enough time and wear, unsightly gaps can begin to open up in interlocking laminate flooring. Storing your laminate flooring materials in your garage, basement, or foyer also keeps them from being exposed to the elements.
 To close a gap in your laminate flooring, all youll need is some wood glue. This could dislodge it, or even damage the underside of the flooring.
 It can be used onfloating flooring with planks that are 2" or wider. Apply a thick coat of glue to the tongue of the board thats come loose. Yes, the Floor Gap Fixer has a special adhesive that is reusable. With over 27 years of experience, Norman has expertise in all five of the general building trades (carpentry, ceramic tile, drywall, electrical, plumbing). wikiHow is where trusted research and expert knowledge come together. You can find floor gap fixers at most major home improvement centers or online for around $40-60. For tips from our Handyman co-author on how to prevent gaps from emerging in your laminate flooring, keep reading! Gaps that remain open can lead to problems that can only be fixed by reinstalling the floor. If youre looking for an alternative to a commercial floor gap fixer tool, a heavy, rubber-soled boot may do the trick. The Floor Gap Fixerwas designedusinghighqualitymaterials that can withstand heavy use by a contractor or occasional use by the DIYer. If you send us the flooring type and brand we can see if any other customers have reported success with the brand or flooring type. Fluctuations in temperature and humidity can cause certain types of laminate flooring to swell and shrink slightly. 2000-2022 Home Depot.
  All Rights Reserved. Wood glue dries quickly, and once it does, it will be tough to get a second shot. The Floor Gap Fixer closes gaps in floating floors quickly and easily without the need to remove baseboard molding. Norman Raverty is the owner of San Mateo Handyman, a handyman service in the San Francisco Bay Area. If you used caulk or wood putty to fill the gap, you may need to sand down the excess material once it has had time to dry.
  Some types oflocking systems on vinyl floors may cause problems. Alternatively, push down with your full body weight, then push the board together. https://www.youtube.com/watch?v=_QAd0hswxP0&feature=youtu.be&t=23, https://www.youtube.com/watch?v=CE3FeTNT7nI&feature=youtu.be&t=66, https://www.youtube.com/watch?v=CE3FeTNT7nI&feature=youtu.be&t=71, https://www.youtube.com/watch?v=_QAd0hswxP0&feature=youtu.be&t=73, https://www.youtube.com/watch?v=CE3FeTNT7nI&feature=youtu.be&t=138, https://www.youtube.com/watch?v=CE3FeTNT7nI&feature=youtu.be&t=220, https://baileylineroad.com/simple-trick-ensures-gap-free-laminate-floors/, https://www.familyhandyman.com/floor/floor-repair/home-repair-how-to-seal-laminate-flooring-expansion-gaps/view-all/, https://www.homeflooringpros.com/blog-guides/underlayment/, fermer les interstices dans les sols stratifis.
  After successfully closing the gap, simply pull up the floor gap fixer to remove it. No, the Floor Gap Fixer does not leave behind any residue on the floor.